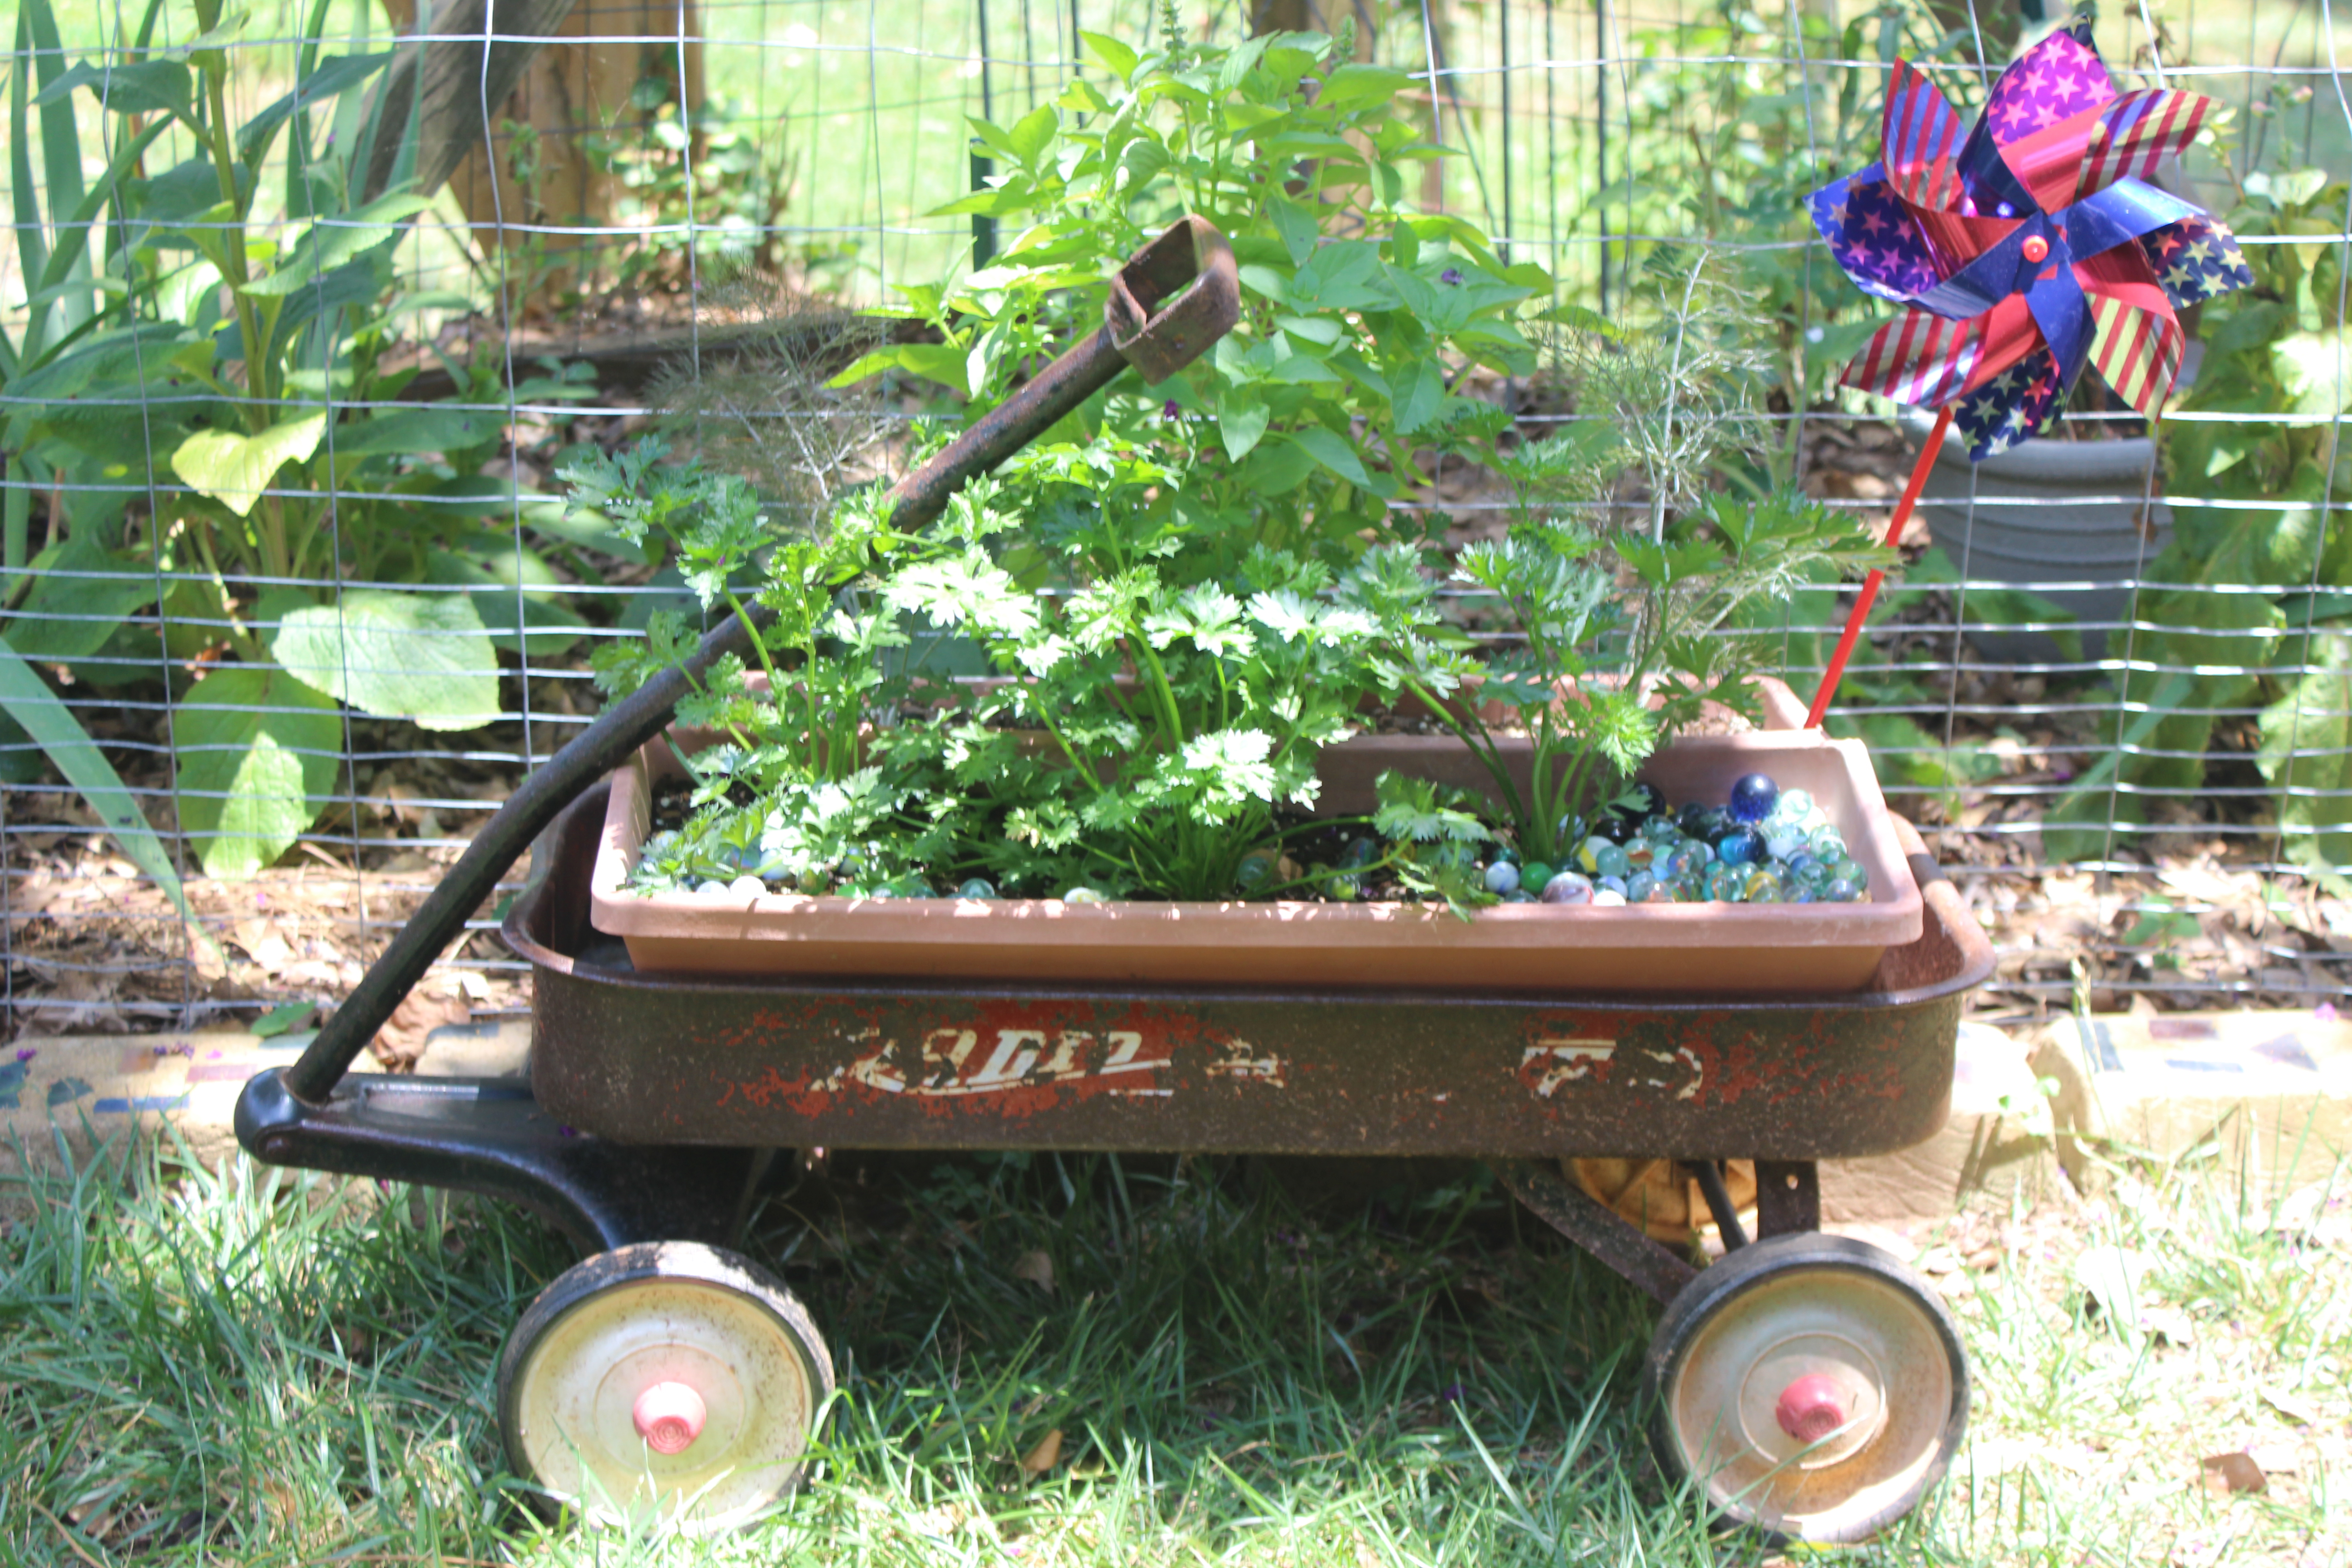
The kids are grown now. No grandkids in sight. No use keeping this rusty, little Radio Flyer wagon. It’s too small to haul things in. It’s got that big dent in the side. The paint’s half off and it’s rusting away.
It’s one of the racing wagons. My boy and girl used to pull those up to the top of our hill and race down toward the lake, banging into each other as they went. It made me nervous, to see them flying at top speeds toward open water. Just in time, they would whip them aside for one final wreck. I should have put a stop to it, but the screams of joy were worth risk of bumps and bruises.
Once Mermaid Barbie rode shotgun with the girl during a particularly fierce downhill battle. When it was over, the girl realized that Barbie had lost her head. We looked high and low for it. Finally, I bent down and looked under that little wagon. There was Barbie’s head, dangling up under the axle by that long blonde mane. Her head was removed with the help of scissors. It had to be screwed back on, literally.
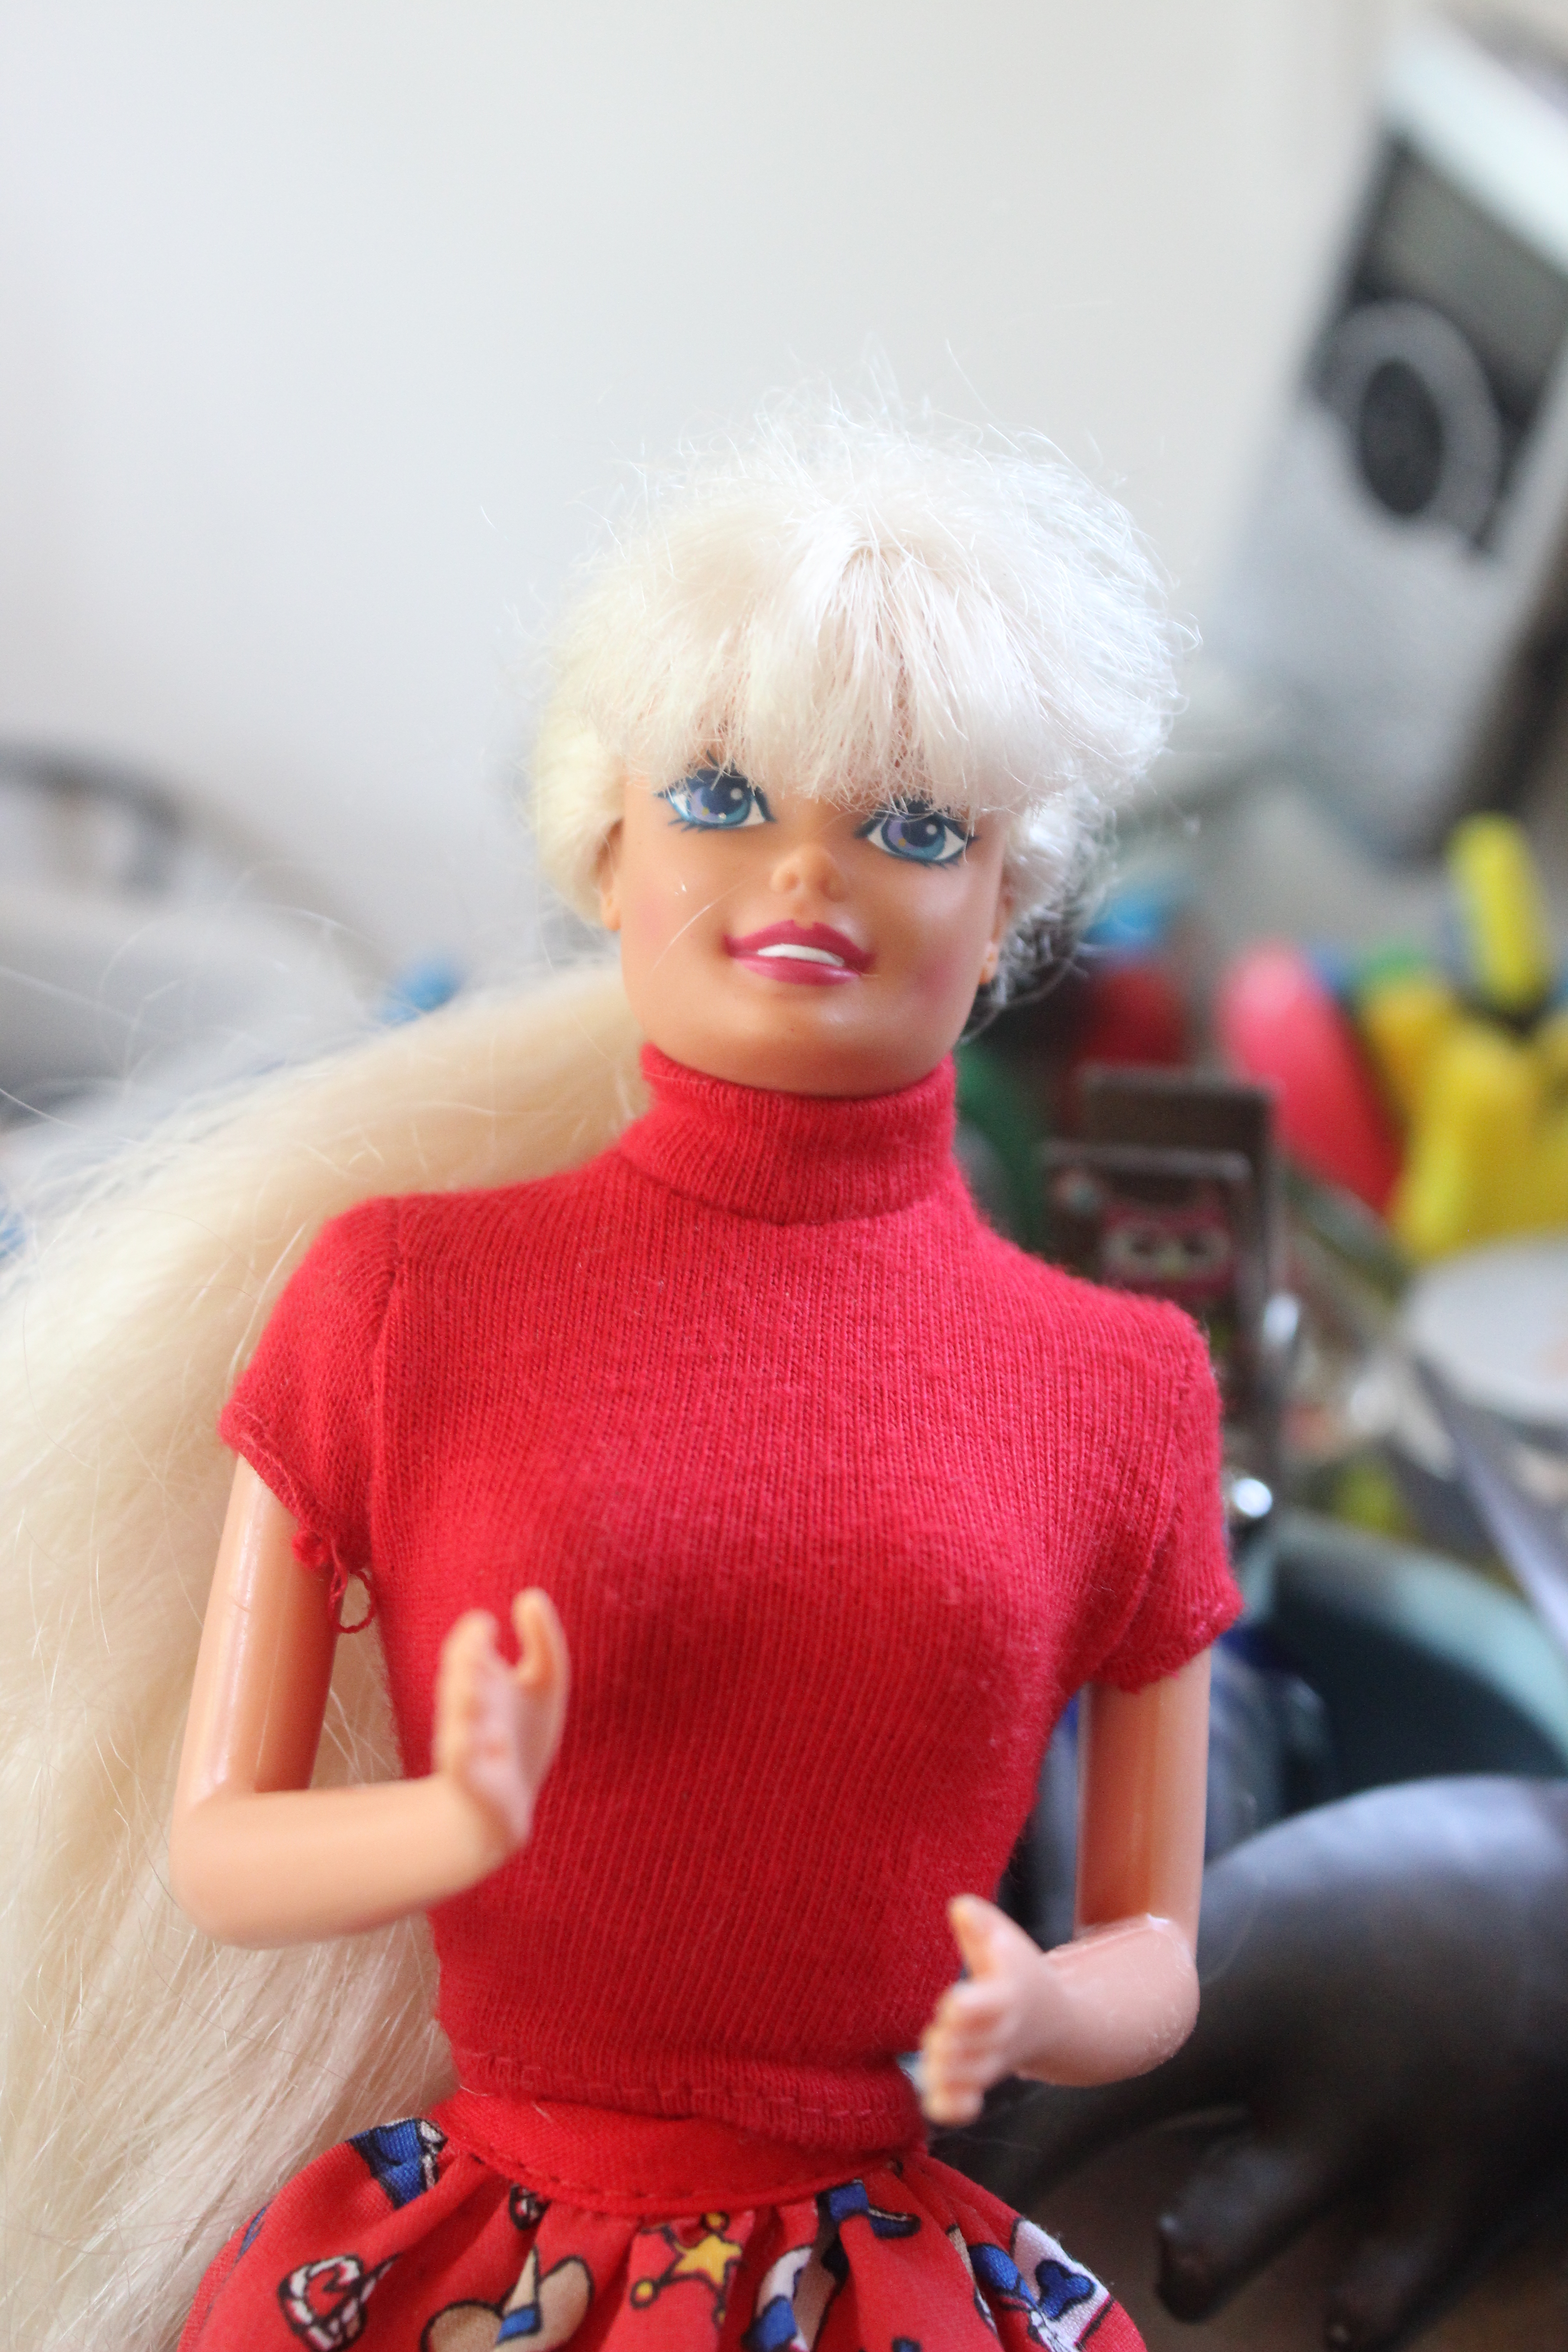
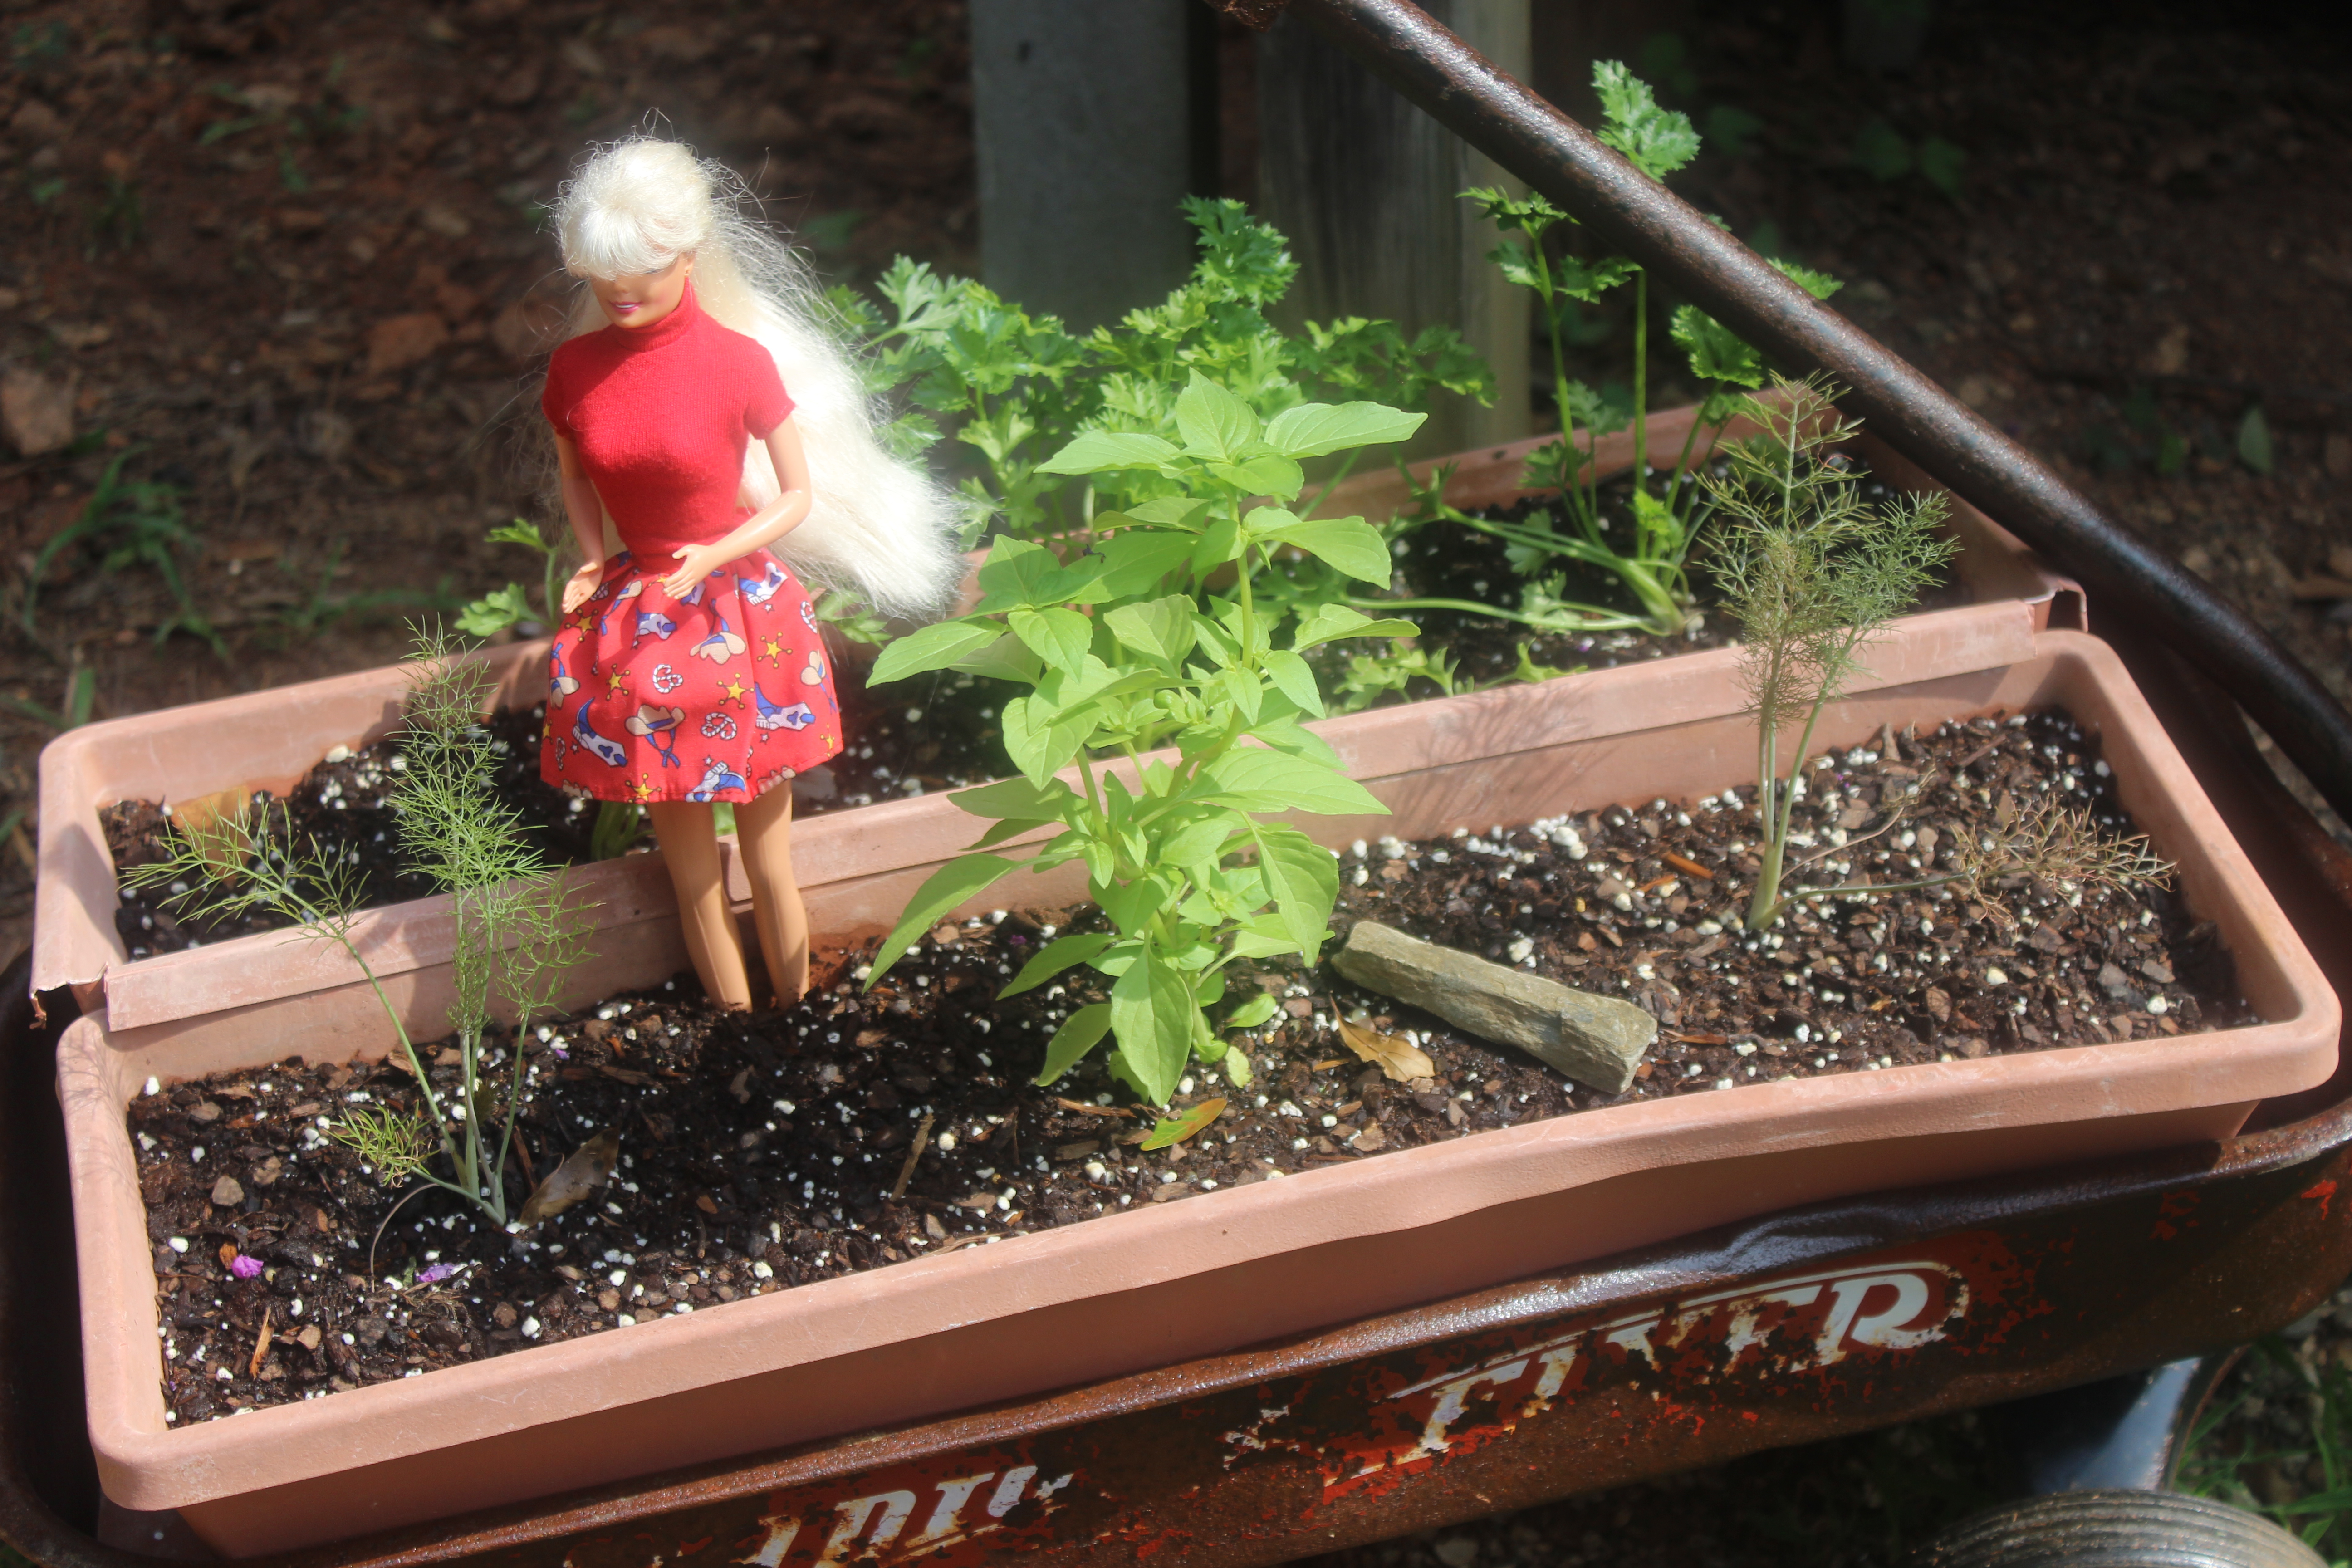
Babs back on the wagon.
Here are the steps I took in preserving and re-purposing the little Radio Flyer wagon. I did not want to repaint it.
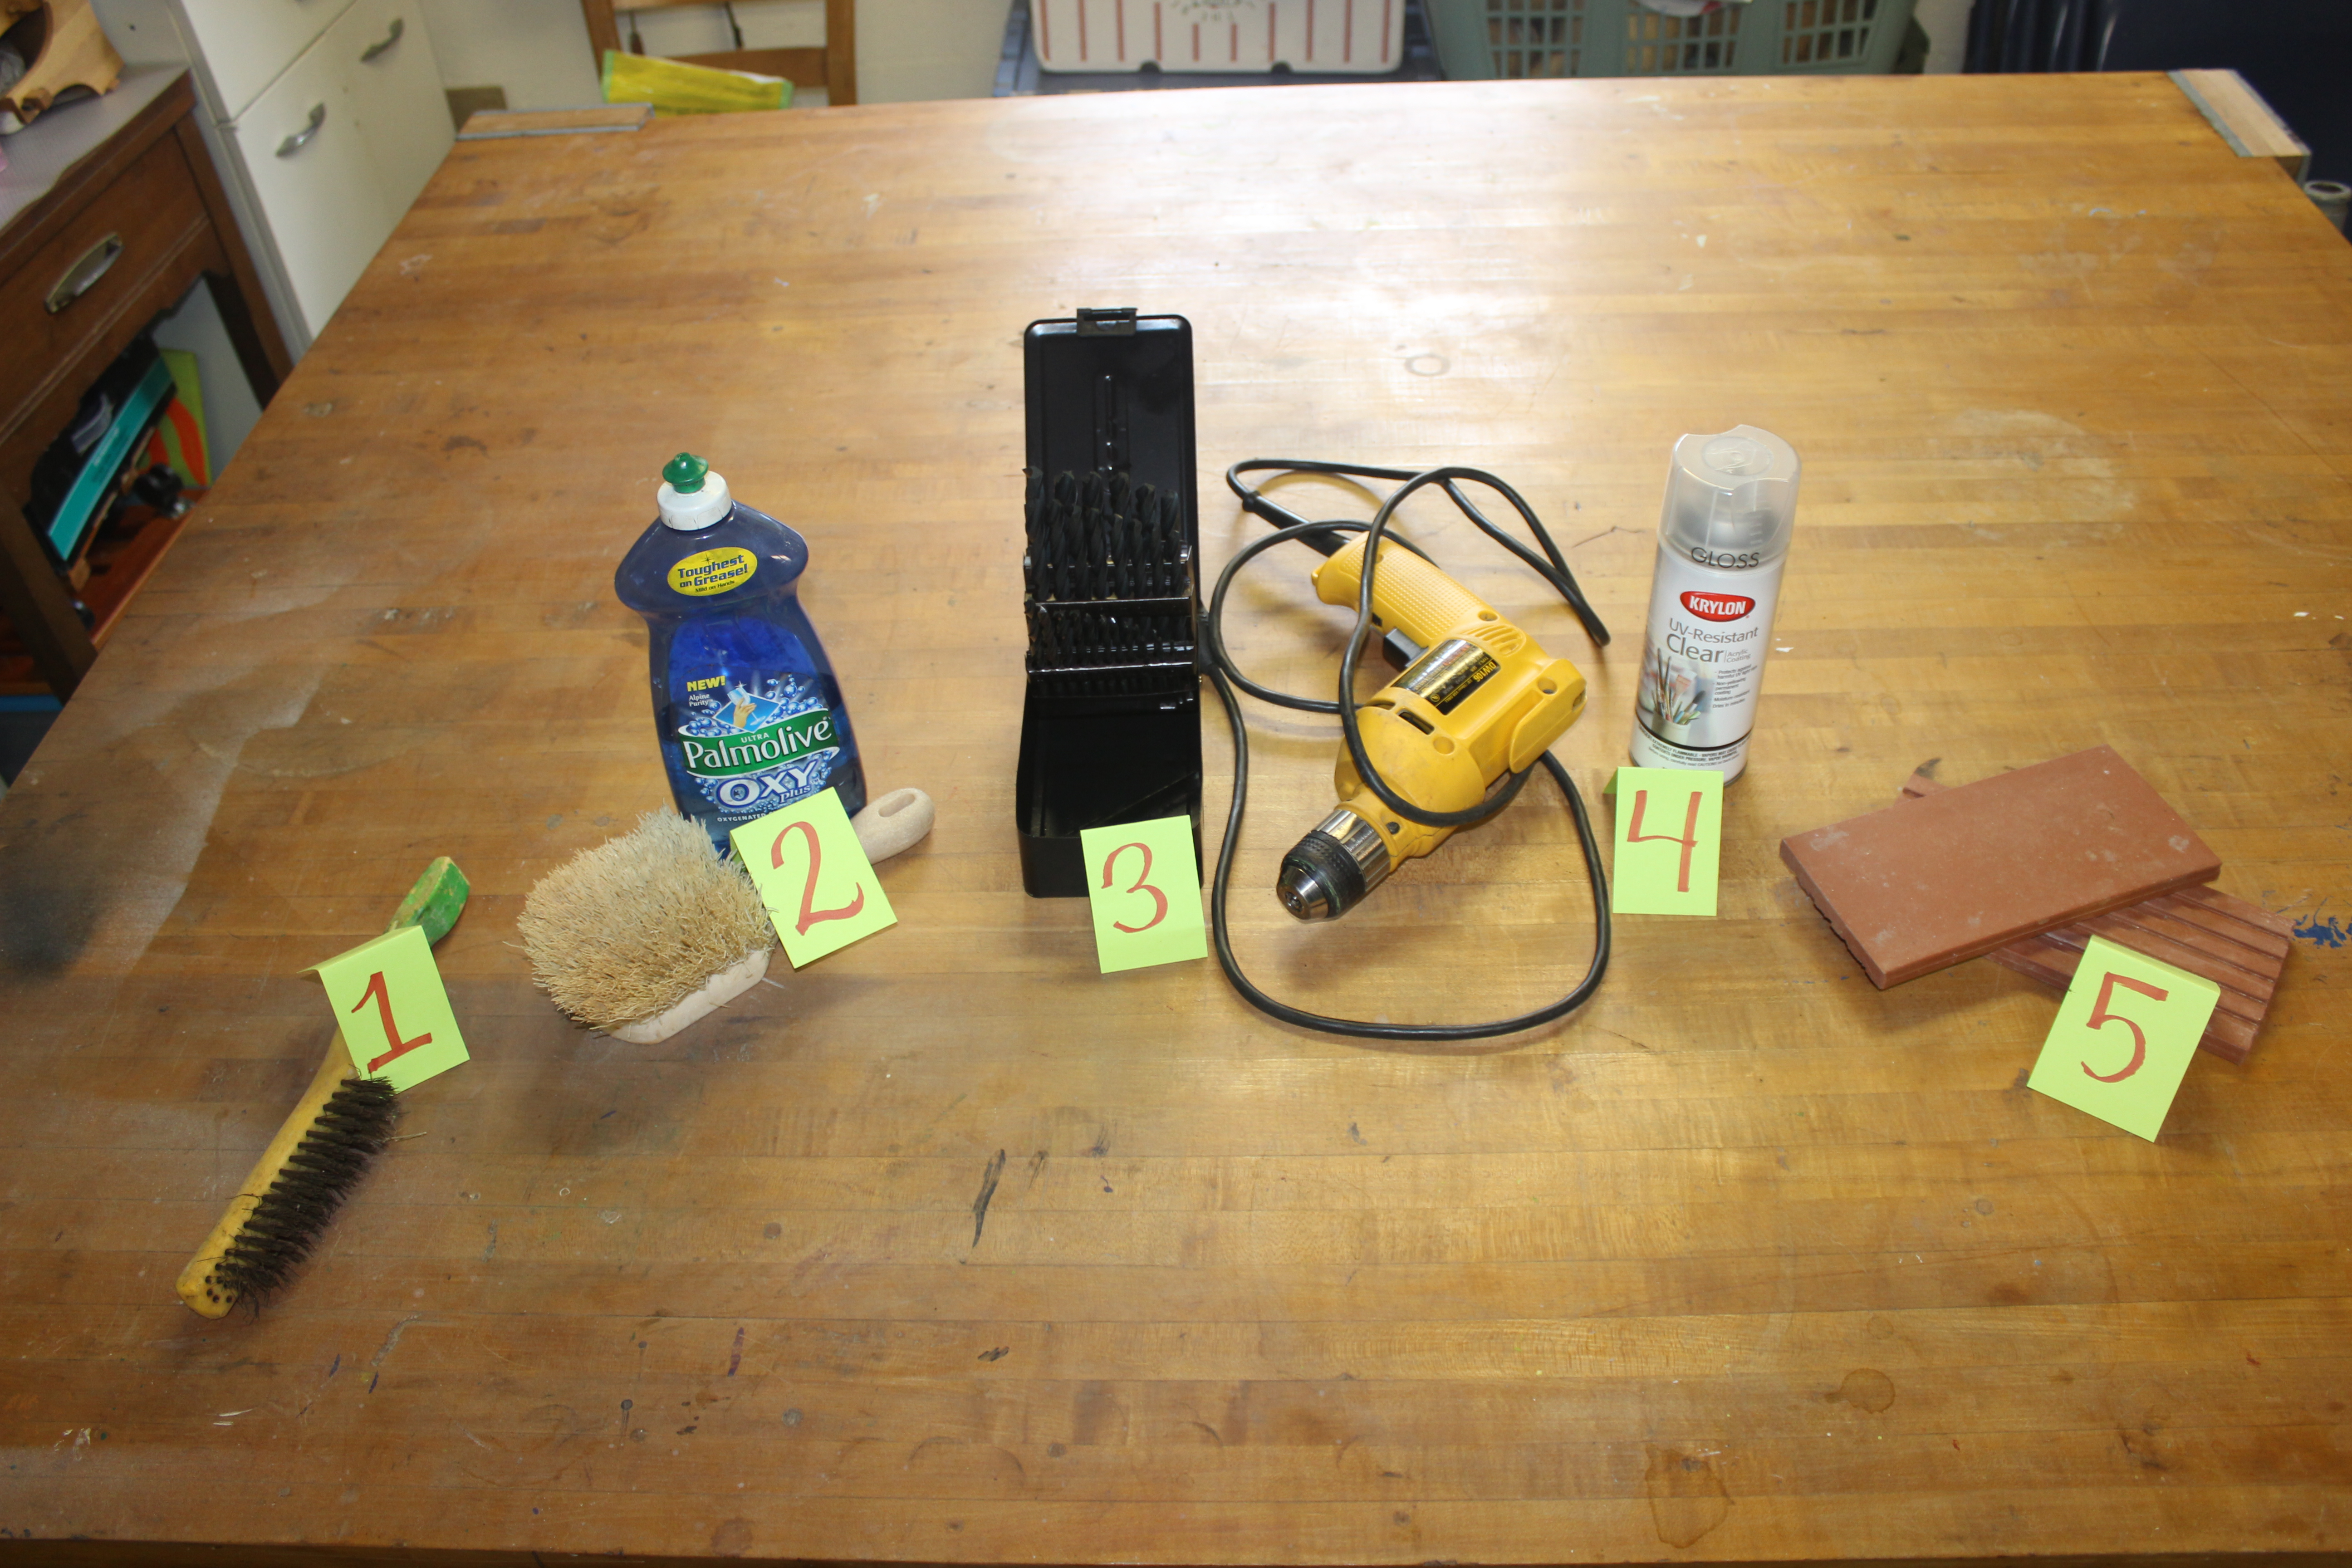
1. Use a wire brush to remove rust.
2. Scrub off rust dust and debris with a scrub brush. Then wash and dry.
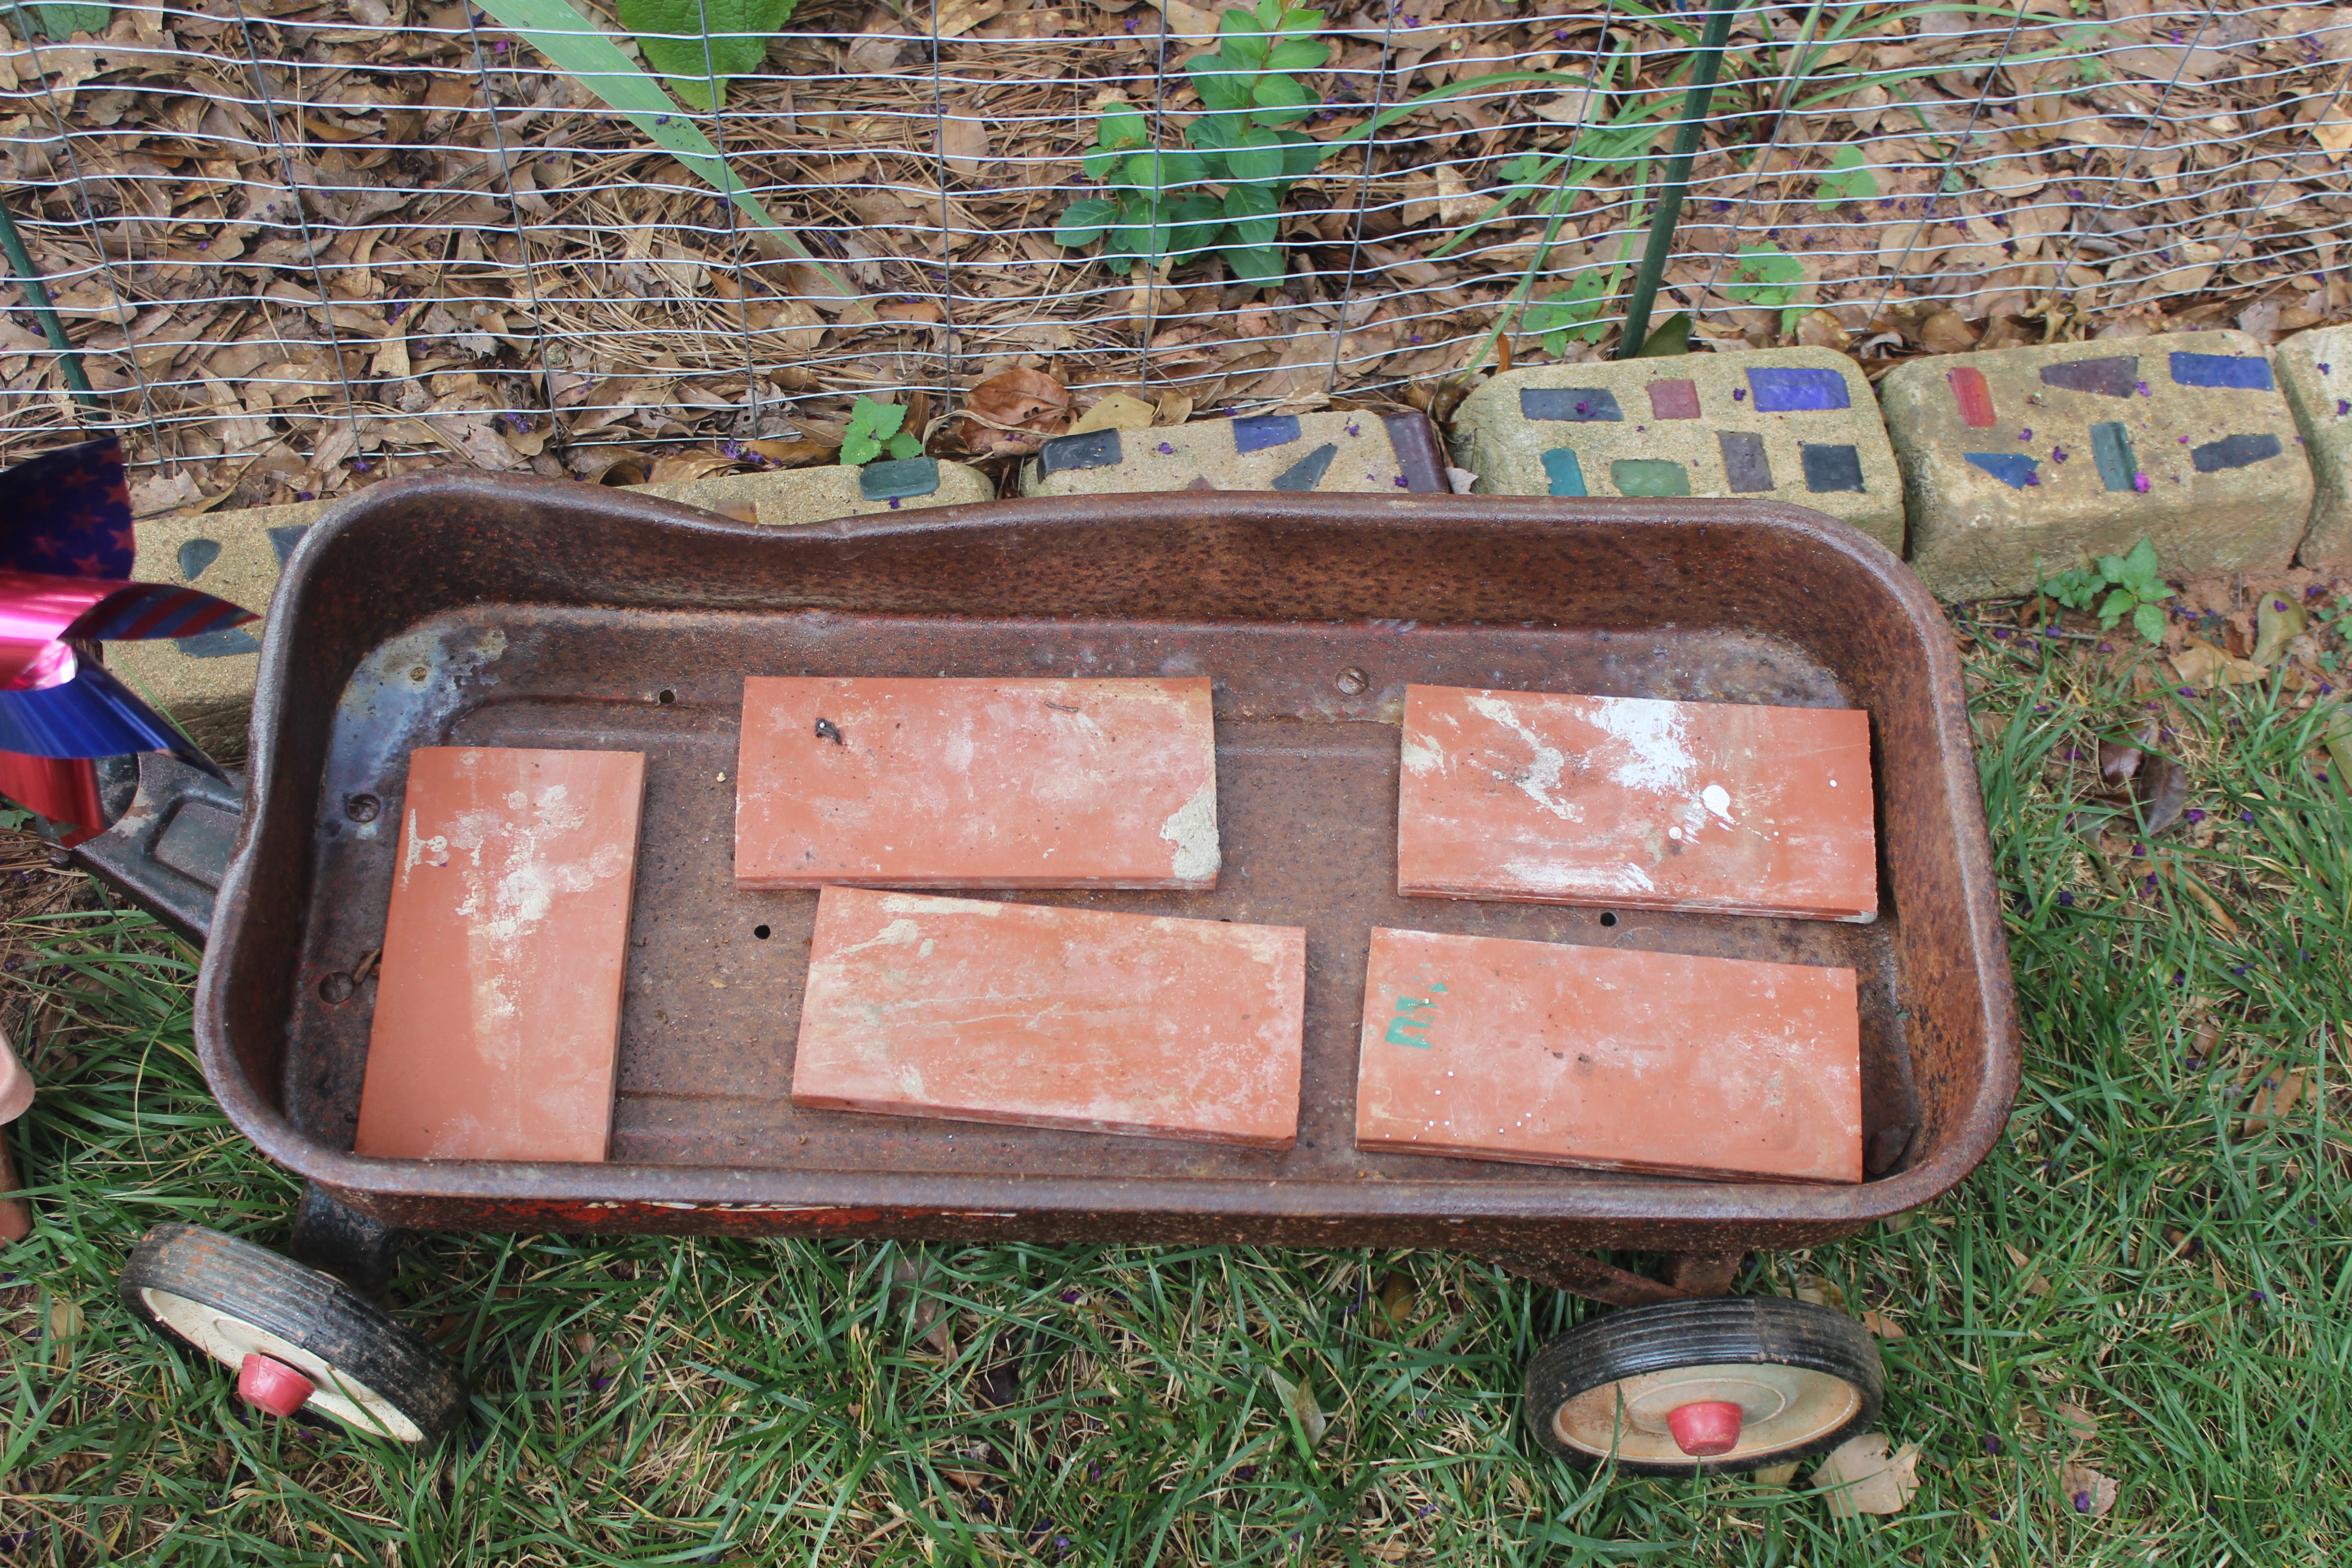
3. Drill 12-15 holes in the bottom using a drill bit for metals.(They are black.)
4. Seal the entire wagon with an acrylic sealant appropriate for metals.
5. Place tiles in the bottom for better drainage of planters.

I just had to hold on to that little wagon, since it held so many memories for me.